

One of the first stops on my IBD journey was going gluten free. When I was first diagnosed with Ulcerative colitis, I didn’t know where to start with what to eat for IBD. Despite recently finding out that there is a 97% chance that I do not have celiac, my attempts to reintroduce it to have once in a while have not been great.
Naturally I’ve been trying to find good alternatives ever since. In 2018 I discovered a Gluten Free Bakery while traveling in Australia and it gave me hope that good bread is still possible even when gluten free. I came back from my trip and immediately jumped into my bread making journey.
If you’d like to know the best gluten free sourdough bread – read on!
The Best Gluten Free Sourdough Bread
One of my first blogs on this website was a Gluten-Free Focaccia Bread. Gluten Free Sourdough has been on my radar to discuss for a while! I am an impatient baker, so I found some work arounds for creating a version for those like me that just can’t be bothered often with the art of making gluten free bread. If that’s you, you need to go to this recipe.
I actually really enjoy the “impatient version” of this recipe and it’s one of my favorites to make. Check it out if you want to start off with an easy version. If you’d like the more traditional route, continue with this blog!
You Don’t Need Gluten to Make Good Bread
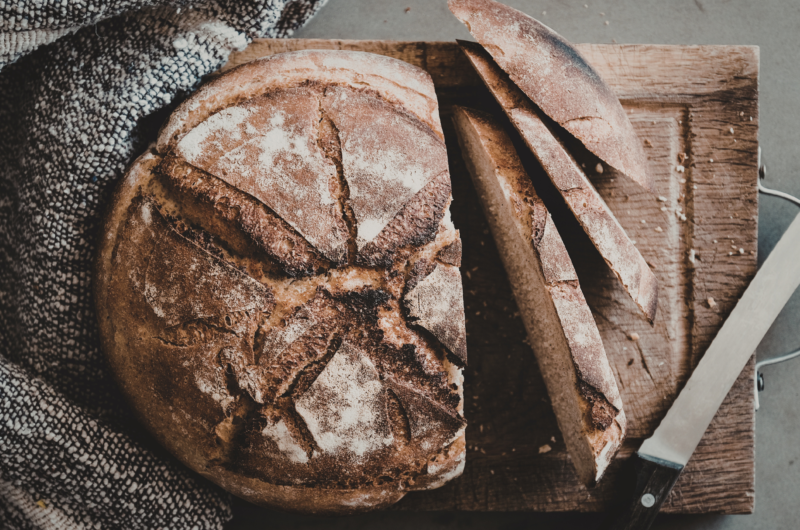
If you’ve ever bitten into a slice of gluten free bread and been met with a dense, gummy, cardboard-adjacent experience, then this recipe is for you.
The good news? You don’t need gluten to make great sourdough. You do need the right flour blend to create the right flavor profile. If you’ve had enough of the dense, dry, and sometimes additive-heavy substitutes that pass for gluten free bread in most supermarkets- making it is honestly not as hard as you’d think.
This is the a comprehensive guide to gluten free sourdough bread. We cover the science behind why gluten free sourdough works, a full day-by-day starter guide, the complete recipe with all six steps, an in-depth troubleshooting section, flavor and texture variations, health benefits, a comparison with regular sourdough for curious readers, and answers to every question the beginner baker is likely to have. Whether this is your first loaf or your fiftieth, there is something in here for you.
Why this recipe works: We use a psyllium husk gel to mimic gluten’s elasticity, a precisely balanced blend of rice flour and starches for structure and chew, and a long cold ferment that develops real sourdough flavor without any gluten in sight.
Why this gluten free sourdough bread recipe actually works
Most gluten free sourdough recipes fail for one of three reasons: the wrong flour ratio, no structural binder, or skipping the long ferment that gives sourdough its signature flavor. This recipe solves all three.
The science of gluten-free sourdough
In traditional sourdough, gluten has a network of proteins formed when wheat flour is hydrated and provides two critical properties: extensibility (the dough can stretch as gas expands) and strength (it holds its shape and traps those gas bubbles). The result is an open, airy crumb inside a chewy, well-risen loaf. Without gluten, neither of these properties exists naturally. The dough has no structural framework, no gas-trapping mechanism, and no elasticity. Left alone, it bakes into something flat and dense.
Psyllium husk powder changes this equation completely. When hydrated, psyllium husk forms a viscous, elastic gel through a process called mucilage formation. The soluble fiber in the husk absorbs water and expands into a network of long, flexible chains that behave remarkably like gluten. This gel is elastic enough to stretch as fermentation gases expand the dough, strong enough to hold the loaf’s structure during the long cold retard, and stable enough to set during baking into the chewy, slice-able crumb that distinguishes great gluten free sourdough from ordinary gluten free bread.
The flour blend addresses a separate problem: no single gluten free flour can replicate the properties of wheat flour. White rice flour provides structure and a neutral flavor base. Tapioca starch adds chewiness and helps create the slightly sticky, open crumb that makes sourdough so satisfying. Potato starch contributes lightness and moisture retention, preventing the dry, crumbly texture that plagues many single-flour gluten free recipes. Together, the three create something greater than any of them alone.
The fermentation process is where the ‘sourdough’ part of gluten free sourdough lives. A wild yeast and lactic acid bacteria starter that is built with rice flour and water over five to seven days, produces carbon dioxide (for rise) and organic acids, particularly lactic and acetic acid (for flavor). The slow, cold overnight ferment allows these acids to develop fully, creating the tang that separates real sourdough from anything that can be faked with commercial yeast and vinegar.
Pro Tip: The overnight cold retard (refrigerating the shaped dough overnight) is the single biggest flavor upgrade you can make. The cold slows yeast activity while allowing acid-producing bacteria to keep working, building flavor complexity that a same-day bake can never achieve. Do not skip it.
Gluten free sourdough vs. regular sourdough: key differences
If you are coming from a background of baking traditional wheat sourdough, the gluten free process will feel unfamiliar in several important ways. Understanding these differences upfront prevents frustration and sets accurate expectations.
| Feature | Traditional sourdough | Gluten free sourdough |
|---|---|---|
| Primary binder | Gluten network formed naturally from wheat protein | Psyllium husk gel (added deliberately) |
| Dough texture | Stretchy, tacky, elastic — can be shaped and folded | Thick, sticky, paste-like — shaped with wet hands only |
| Rise during bulk ferment | Doubles in size or more | 20–30% increase; looks slightly puffed, not dramatic |
| Starter base | Wheat or rye flour | Rice flour (or other GF grain) |
| Scoring behavior | Dramatically opens in the oven | Opens more subtly; still important for oven spring |
| Crumb structure | Large, irregular holes throughout | Smaller, more uniform holes — still open but less dramatic |
| Flavor | Complex lactic and acetic acid tang | Equally complex tang, with slightly different flavor profile |
| Cooling requirement | 30 min minimum | 2 hours minimum — crumb sets more slowly without gluten |
Ingredients for gluten free sourdough bread
Understanding what each ingredient does — and why it cannot simply be omitted or swapped at random — is the difference between baking by rote and baking with confidence. Here is a complete ingredient breakdown.
The flour blend: why each component earns its place
White rice flour forms the structural backbone of this recipe. It is finely milled, mild-flavored, and produces a crumb that is neither too dense nor too crumbly. Brown rice flour can be substituted for a slightly nuttier, more whole-grain flavor and a marginally denser texture — both are acceptable choices, though white rice flour produces the most neutral, versatile result.
- 200g (1 and 2/3 cups) white rice flour — backbone of the blend; provides structure and neutral flavor
- 80g (3/4 cups) tapioca starch — adds chew, stretch, and helps create an open crumb; one of the most important elements for mimicking wheat sourdough texture
- 40g (1/3 cups) potato starch — lightens the loaf, improves moisture retention, and prevents the dry, crumbly texture common in gluten free baking
The ratio of rice flour to starch matters significantly. Too much starch relative to flour produces a gummy, stretchy crumb that collapses when sliced. Too little starch produces a dry, powdery loaf that falls apart. This 200:80:40 ratio has been tested extensively and represents the optimal balance for a sandwich-friendly, slice-able crumb.
Scale is non-negotiable: Use a digital kitchen scale for every measurement in this recipe. Volume measurements for gluten free flours are notoriously unreliable — a packed cup of rice flour can weigh 30% more than a lightly scooped one. That variation alone can turn a successful loaf into a dense brick.
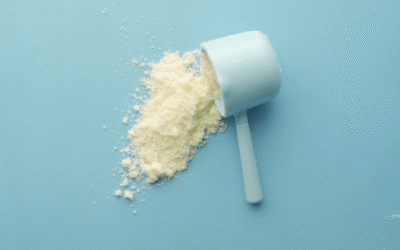
The binder: psyllium husk powder in depth
Psyllium husk powder is the most critical non-flour ingredient in gluten free sourdough. It is made from the ground outer husk of Plantago ovata seeds and is composed almost entirely of soluble fiber. When hydrated, it forms a mucilaginous gel in seconds — the elastic, cohesive gel that replaces gluten’s structural role in the dough.
Several important notes on psyllium husk: First, use the powder form, not whole husks. Whole psyllium husks absorb water more slowly and less completely, resulting in uneven gel formation and poor dough structure. Second, the quantity matters precisely — 15g per 320g of flour is the optimal ratio for this recipe. Too little (below 12g) and the loaf will not hold together; too much (above 18g) and the crumb becomes dense, gummy, and slightly purple-tinged in color (which, while harmless, is alarming to new bakers).
Third, allow the gel to hydrate fully — a minimum of 15 minutes — before incorporating it into the dough. Rushing this step produces a dough with uneven gel distribution and inconsistent texture.
| Binder option | Gel strength | Flavor impact | Best for | Notes |
|---|---|---|---|---|
| Psyllium husk powder | High — elastic, cohesive | Completely neutral | Sourdough, sandwich loaves, artisan bread | Best overall choice for GF sourdough |
| Xanthan gum | Medium — firm but less elastic | Slight aftertaste in high quantities | Quick breads, muffins, cookies | Use 2 tsp as a substitute; less suitable for open crumb |
| Flax gel (ground) | Low-Medium — softer set | Mildly nutty | Dense, seeded, whole-grain style loaves | 1 tbsp ground flax + 3 tbsp water per egg; works in a pinch |
| Chia gel | Low-Medium — similar to flax | Neutral to slightly earthy | Hearty loaves with seeds | Same ratio as flax gel; slightly firmer result |
The sourdough starter and liquids
- 150g active gluten free sourdough starter — at peak activity (bubbly, domed, recently fed); see the full starter guide below
- 280g filtered or non-chlorinated water, room temperature — chlorine in tap water can inhibit wild yeast and bacterial fermentation; if your tap water is chlorinated, leave it in an open container for 30 minutes or use filtered water
- 10g apple cider vinegar — adds tang, improves the rise, and helps activate the psyllium gel; white wine vinegar is a 1:1 substitute
- 8g fine sea salt — essential for flavor and for controlling fermentation speed; do not reduce
- 15g olive oil or melted coconut oil (optional) — adds richness, improves crust tenderness, and extends shelf life by one additional day
Substitutions and dietary swaps
| Original ingredient | Substitution | Impact on result |
|---|---|---|
| White rice flour | Brown rice flour | Slightly denser, more nutty flavor; works well |
| Tapioca starch | Arrowroot starch | 1:1 swap; result is slightly chewier with less stretch |
| Potato starch | Arrowroot starch | 1:1 swap; slightly less light than potato starch |
| Psyllium husk powder | 2 tsp xanthan gum | Denser, less open crumb; still slice-able. Some notice gas with xanthan gum. |
| Olive oil | Avocado oil | same structural benefit |
| Olive oil | Omit entirely | Crust is slightly less tender; shelf life reduced |
| Apple cider vinegar | White wine vinegar | Identical tang boost; no flavor difference |
| Filtered water | Rested tap water (30 min open) | Effective substitute if chlorine is given time to dissipate |
How to make a gluten free sourdough starter
Your starter is the living heart of this bread — a fermented culture of wild yeast and lactic acid bacteria that will leaven your loaves and develop their flavor over months and years. Unlike commercial yeast, which produces only carbon dioxide, a sourdough starter produces both carbon dioxide (rise) and organic acids (flavor). Building one from scratch takes five to seven days and requires nothing more than rice flour, non-chlorinated water, and a clean jar.
Equipment you will need
- A clean glass jar with at least 500ml capacity — wide-mouth Mason jars work perfectly
- A kitchen scale — essential for consistent feeding ratios
- A rubber band or marker to track rise and fall
- A breathable cover — a loose lid, a piece of cloth secured with a rubber band, or a coffee filter; the starter needs air circulation but should be protected from debris
Day-by-day starter schedule
| Day | Action | What to expect |
|---|---|---|
| Day 1 | Mix 50g white rice flour + 50g warm water (80–85°F / 27–29°C) in a clean jar. Stir thoroughly. Cover loosely. Leave at room temperature (ideally 75–80°F). 50 grams = 1/3 cup + 3 TBSP | No visible activity. Just a thick paste. This is normal — wild yeast takes time to establish. |
| Day 2 | Discard all but half of the mixture. Add 3.5 tbsp rice flour + 3 tbps warm water. Stir thoroughly. Cover and rest. | Possibly a few small bubbles. Maybe none. Both are normal at this stage. |
| Day 3 | Discard down to half. Add 3.5 tbsp rice flour + 3.5 tbsp warm water. | Bubbling should be increasing. A faintly sour or yeasty smell is a good sign. The mixture may look slightly risen or bubbly on the surface. |
| Day 4 | Begin feeding twice daily (morning and evening). Each feed: discard half, add 3.5 tbsp flour + 3.5 tbsp water. | The starter should be visibly more active — rising after feeds, showing bubbles throughout, smelling pleasantly sour. Mark the jar level with a rubber band after each feed to track the rise. |
| Day 5 | Continue twice-daily feedings. | A well-established starter will double in size within 4–8 hours of feeding. If yours is showing this behavior consistently, it may already be ready to use. |
| Day 6 | Continue twice-daily feedings. Test for readiness: does it double within 4–8 hours? Does it pass the float test? | If yes to both — your starter is ready. If not yet reliably doubling, continue Day 4–5 protocol for another 1–2 days. |
| Day 7 | Readiness confirmation: use starter at peak (doubled, domed at top, or just beginning to fall). Perform float test. | A mature, active starter ready for its first bake. |
The float test: Drop a small spoonful (about 1/2 teaspoon) of starter into a glass of room-temperature water. If it floats, the starter is active enough — it is full of trapped carbon dioxide bubbles from fermentation. If it sinks, give it another feed and test again in 4–6 hours. Do not bake with a starter that fails the float test; the loaf will not rise.
Maintaining your starter long-term
Once established, your gluten free sourdough starter can be maintained indefinitely with minimal effort. If you bake regularly (every few days), keep the starter at room temperature and feed it once or twice daily. If you bake less frequently, store it in the refrigerator and feed it once a week.
Refrigerator storage: remove the starter 12–24 hours before baking, feed it, and allow it to reach peak activity before using. A refrigerated starter may take longer to wake up after extended storage — if it seems sluggish, give it two or three feeds at room temperature before using it in a bake.
Signs of an unhealthy starter to watch for: a pink or orange tinge (contamination — discard and start over), a very strong unpleasant smell beyond normal sourness (may indicate unwanted bacterial overgrowth), or persistent failure to rise after multiple feedings despite consistent temperature and feeding schedule.
Discard isn’t waste: The portion of starter removed during each feeding — called the discard — can be used in pancakes, crackers, pizza dough, and flatbreads. It won’t leaven bread on its own (it’s not at peak activity) but it adds flavor and reduces waste. Many bakers keep a separate discard jar in the fridge.
How to make gluten free sourdough bread: step-by-step
The following six steps represent the complete process from mixing day to slicing day. Read through the entire process before starting. Gluten free sourdough dough behaves very differently from wheat dough, and knowing what to expect at each stage will prevent you from second-guessing yourself at critical moments.
Step 1 — Make the psyllium gel (15 minutes before mixing)
Measure 15g psyllium husk powder into a small bowl or large measuring cup. Add 100g of the measured water — this is taken from the total 280g, not in addition to it. Whisk briskly for 10–15 seconds. The mixture will gel almost immediately into a thick, slightly translucent mass. This is correct. Set it aside for a minimum of 15 minutes to fully hydrate and stiffen.
If the gel is lumpy or has dry patches after mixing, whisk more vigorously. If it remains very loose and liquid after 15 minutes, your psyllium husk may be old or of poor quality — replace it and start again. A properly hydrated psyllium gel should hold its shape if you scoop a spoonful out of the bowl.
Step 2 — Mix the dough
In a large mixing bowl, whisk together the rice flour, tapioca starch, potato starch, and salt until evenly combined. In a separate jug or bowl, stir together the active starter, remaining 180g water, apple cider vinegar, and oil (if using) until the starter is fully dispersed.
Pour the liquid mixture into the dry ingredients and stir until a rough, shaggy dough begins to form — about 30 seconds. Add the psyllium gel and mix vigorously with a flexible spatula or your dominant hand for 2–3 minutes. The dough will transform from rough and lumpy to smooth and cohesive as the psyllium gel distributes evenly through the flour. The finished dough should feel like very thick hummus: sticky, dense, and slightly resistant, but not soupy or flowing.
Important: Do not attempt to knead gluten free sourdough dough. There is no gluten to develop and vigorous kneading will only tear the psyllium husk network. Mix until the dough is smooth and well-combined, then stop.
Step 3 — Bulk ferment (4–6 hours at room temperature)
Cover the mixing bowl tightly with plastic wrap or a damp clean towel. Leave at room temperature for 4 to 6 hours. The ideal temperature range for bulk fermentation is 75–80°F (24–27°C). At this temperature, the dough should show visible signs of fermentation activity — a 20–30% increase in volume, small bubbles on the surface and edges, and a faint sour aroma beginning to develop.
Managing bulk ferment temperature is important. In a warm kitchen (above 80°F), fermentation will proceed faster — check the dough after 3.5 hours. In a cool kitchen (below 70°F), fermentation will be slower — the dough may need up to 8 hours. Use the visual cues (bubbles and volume increase) rather than the clock as your primary guide. An under-fermented dough will produce a dense, under-flavored loaf; an over-fermented dough will become excessively acidic and lose structural integrity.
Cool kitchen solution: Place the covered dough in a turned-off oven with just the oven light on. This maintains a temperature of approximately 75–80°F regardless of ambient room temperature and produces more consistent fermentation results.
Step 4 — Shape and pan
Wet your hands generously with water — this is essential for handling sticky gluten free sourdough dough without it tearing or sticking to your palms. Do not use flour to prevent sticking; it will create dry patches on the surface of the loaf.
For a sandwich loaf: lightly oil a 9×5 inch loaf pan. Scoop the dough into the pan with wet hands or a wet spatula. Smooth the top with wet fingers, working from the center outward to create a slightly domed, even surface. The dough should fill the pan roughly halfway.
For a round boule: line a round banneton (proofing basket) with a cotton cloth dusted generously with rice flour. Scoop the dough into the banneton, smooth the top, and dust the exposed surface with additional rice flour before covering.
Step 5 — Cold retard (overnight in the refrigerator)
Cover the shaped loaf tightly with lightly oiled plastic wrap and place it in the refrigerator overnight, or for 12 to 16 hours. This cold retard is the most flavor-critical step in the entire process. The cold temperature slows yeast activity significantly while allowing the acid-producing bacteria (Lactobacillus species) to continue their work at a reduced pace. The result is a slow, deep flavor development that produces the complex sour tang characteristic of great sourdough — a flavor that simply cannot be achieved by increasing the amount of vinegar or using a flavor additive.
A properly cold-retarded dough will not have risen dramatically during the refrigerator time — this is expected. The structure of the dough has set during the cold, which actually makes it easier to handle and score than a room-temperature dough would be. You can bake the dough straight from the refrigerator, which is one of the practical advantages of the cold retard: no waiting around in the morning.
Step 6 — Bake
Preheat your oven to 450°F (230°C) with a Dutch oven (with its lid) inside on the center rack. Allow at least 45 minutes of preheating time — the Dutch oven must be thoroughly hot through and through for the initial steam phase to work correctly. Rushing this preheat is one of the most common causes of poor oven spring in home-baked sourdough.
Remove the loaf from the refrigerator. Score the top with a sharp serrated knife, razor blade, or bread lame with one decisive slash — aim for a 30-degree angle to the surface, about 1/2 inch deep, running most of the length of the loaf. A confident, swift score opens cleanly and allows the loaf to expand in a controlled direction during baking. A tentative, shallow score closes up and traps steam inside the loaf.
Carefully remove the Dutch oven from the oven (use heavy oven mitts — the handle will be extremely hot). Lower the loaf into the Dutch oven, replace the lid, and return to the oven.
- Bake covered at 450°F for 20 minutes — the covered phase creates a steam environment that keeps the crust moist and extensible, allowing maximum oven spring.
- Remove the lid and continue baking for 30–35 minutes until the crust is deeply golden brown — a pale crust indicates under-baking and will result in a soft, slightly gummy texture.
- Test for doneness with an instant-read thermometer: the interior of the loaf should reach 208–210°F (98°C). If it hasn’t, continue baking in 5-minute increments.
- Remove the loaf from the Dutch oven and cool on a wire rack — not inside the pan — for a minimum of 2 hours before slicing.
Do not slice early: The interior crumb of gluten free sourdough is still actively setting as the loaf cools. Slicing before the 2-hour mark results in a gummy, wet crumb texture even if the loaf is technically fully cooked. If you can resist for 3–4 hours, the texture improves further.
Tips for the best gluten free sourdough bread every time
The difference between a good gluten free sourdough loaf and an exceptional one usually comes down to a handful of precision habits applied consistently. These are the most impactful:
- Use a Dutch oven — always: The enclosed steam environment of a Dutch oven during the first 20 minutes of baking is essential for crust development and oven spring. A baking sheet or standard loaf pan cannot replicate this. If you do not own a Dutch oven, a heavy oven-safe pot with a tight-fitting lid is an acceptable substitute.
- Score decisively: One confident slash at 30 degrees, full length of the loaf. Not a series of hesitant scratches. A sharp razor blade or bread lame gives cleaner results than even a very sharp kitchen knife.
- Weigh everything, including the psyllium husk: A gram of psyllium husk too much can be the difference between a beautiful open crumb and a dense, gummy brick. This is the one ingredient where precision matters most.
- Feed your starter at the right time: Use your starter 8–12 hours after feeding, when it has doubled (or nearly doubled) and is at its dome or just beginning to fall. Using a starter too early (still rising) produces an under-acidic, bland loaf. Using it too late (post-peak, collapsed) produces an overly acidic, poorly risen loaf.
- Give the loaf maximum cooling time: 2 hours is the absolute minimum; 3–4 hours produces a noticeably better crumb texture. If you are baking the day before you need the bread, allow it to cool completely before slicing and it will be at its best.
- Cracklier crust trick: Once the loaf has baked and reached its internal temperature, turn the oven off and leave the loaf (out of the Dutch oven) in the oven with the door cracked open for 30 minutes. The residual heat and dry air produce a crust with significantly more snap and crackle.
Common gluten free sourdough bread problems — troubleshooting guide
Gluten free sourdough has a steeper learning curve than commercial-yeast bread, but virtually every problem has an identifiable cause and a specific fix. Here is a comprehensive guide to the most common issues.
Problem: bread didn’t rise
The most common cause is an inactive or under-ripe starter. Before blaming any other variable, always confirm your starter is genuinely active: it should double within 4–8 hours of feeding and pass the float test. A starter that looks bubbly but sinks in water is producing gas but not enough to leaven bread.
Secondary causes: water temperature that is too cold (below 68°F / 20°C significantly slows fermentation — use warm water around 80°F for the starter and dough); bulk ferment temperature too cool (move to a warmer spot or the oven light method described above); insufficient bulk ferment time (extend by 1–2 hours and re-evaluate). Salt added directly to the starter rather than to the dry flour can also suppress fermentation — always mix salt with the flour first.
Problem: gummy or wet crumb
Nine times out of ten, a gummy crumb has one of two causes: the loaf was sliced before it fully cooled, or it was underbaked. Always verify internal temperature with a thermometer — 208°F minimum. A pale crust is a reliable visual signal of underbaking. For ovens that run cool, increase the uncovered baking time by 10 minutes and verify temperature before removing.
If the loaf reached temperature and was cooled fully but is still gummy, the psyllium husk may have been measured inaccurately. Too much psyllium (above 18g in this recipe) creates a gel that remains sticky even after baking. Try reducing to 13g on the next bake and compare results. Alternatively, the flour may be retaining too much moisture — this can happen with certain brands of rice flour with higher natural moisture content. Try drying the flour in a low oven (200°F for 15 minutes) before weighing.
Problem: bread too dense and heavy
Dense gluten free sourdough is almost always caused by one of four issues: inactive starter (most common — see above), insufficient bulk ferment time, psyllium husk measured too high, or over-mixing after the psyllium gel is added. Over-mixing breaks down the gel network rather than distributing it, producing a dough that cannot trap fermentation gases effectively. Mix until just smooth — no more than 3 minutes — once the gel is incorporated.
If the loaf is dense but has good flavor, the issue is structural rather than fermentation-related: focus on the binder quantity and mixing technique. If it is dense and bland, focus on starter activity and fermentation time.
Problem: loaf crumbles when sliced
Crumbling almost always indicates one of two things: insufficient binder, or slicing while the loaf is still warm (the crumb has not fully set). If slicing temperature has been ruled out, increase the psyllium husk by 2g on the next bake. Check that you are using psyllium husk powder rather than whole husks — whole husks hydrate incompletely and produce a weaker gel. Also ensure the loaf is cooled on a wire rack rather than sitting in the pan, where trapped steam underneath can create a soggy, unstable base.
Problem: no sourdough flavor / tastes bland
Flavor in sourdough comes from time and microbial activity, not from ingredients. If the loaf smells sour but tastes bland, the cold retard was likely not long enough. Extend the refrigerator time from 8 hours to 14–16 hours on the next bake and compare. Also confirm the apple cider vinegar was included — it reinforces the acetic acid notes produced by fermentation and noticeably sharpens the flavor profile.
If the loaf smells and tastes flat (not sour at all), the starter was not at peak activity when used, or the bulk ferment was cut short. A starter at peak will impart robust fermentation flavor even in a shorter cold retard.
Problem: crust too pale or soft
Pale or soft crust is almost always a baking temperature problem. Confirm your oven is genuinely reaching 450°F with an oven thermometer — many domestic ovens run 25–50°F lower than their indicated temperature. Extending the uncovered bake time by 10–15 minutes is the most direct fix. Ensure the Dutch oven is preheated for the full 45 minutes, not just until the oven reaches temperature.
Problem: loaf spreads sideways instead of rising upward
Lateral spreading indicates the dough lacks sufficient structure to hold its shape during baking. Primary cause: too little psyllium husk or psyllium husk that was not allowed to hydrate fully (less than 15 minutes resting time). Secondary cause: the loaf was not cold enough when placed in the oven — a well-chilled loaf from the refrigerator holds its shape better than a room-temperature one. Make sure you are baking straight from the fridge.
| Problem | Most likely cause | Fix |
|---|---|---|
| Didn’t rise | Inactive starter or too cool | Float test starter; warm bulk ferment; use warm water |
| Gummy crumb | Under-baked or sliced too early | Internal temp 208°F+; cool 2–4 hrs minimum |
| Too dense | Inactive starter, under-fermented, or too much psyllium | Test starter; extend bulk ferment; reduce psyllium by 2g |
| Crumbles when sliced | Too little binder or sliced warm | Increase psyllium 2g; use powder not whole husks; cool fully |
| No sourdough flavor | Short cold retard or weak starter | Extend retard to 14–16 hrs; use starter at peak |
| Crust pale or soft | Oven too cool or insufficient bake time | Check oven temp; extend uncovered bake 10–15 min |
| Spreads sideways | Too little psyllium or dough too warm | Increase psyllium; bake straight from fridge |
The health benefits of gluten free sourdough bread
Beyond being a safe choice for people with celiac disease or non-celiac gluten sensitivity, gluten free sourdough bread offers nutritional and digestive advantages that generic commercial gluten free bread simply cannot match. Understanding these benefits helps contextualize why the extra effort of making real fermented sourdough is worthwhile from a health perspective, not just a culinary one.
Safe for celiac disease and gluten sensitivity
For the approximately 1% of the global population with celiac disease — an autoimmune condition in which gluten triggers an immune response that damages the small intestinal lining — and the larger population with non-celiac gluten sensitivity, gluten free sourdough bread made with certified gluten free ingredients is one of the safest and most nutritionally complete bread options available. Unlike commercial gluten free breads, which often rely on processed starches, additives, and preservatives to approximate the texture of wheat bread, this recipe is built from whole-food ingredients with minimal processing.
Important caveat for celiac disease: all ingredients must be certified gluten free, including the rice flour, tapioca starch, potato starch, and psyllium husk. Cross-contamination during manufacturing is a genuine risk. Verify that every package carries a certified gluten free label.
Improved digestibility through fermentation
The long fermentation process — particularly the overnight cold retard — produces lactic and acetic acids that begin pre-digesting the starch in the flour, reducing the glycemic response compared to unfermented gluten free bread. The acids also partially degrade phytic acid, an antinutrient found in grains and seeds that binds to minerals such as zinc, magnesium, and iron and reduces their bioavailability. Fermented gluten free sourdough therefore delivers better mineral absorption than the same ingredients baked without fermentation.
Gut microbiome support
Real sourdough fermentation produces a range of organic acids, peptides, and other fermentation byproducts that have demonstrated prebiotic effects — meaning they selectively feed beneficial gut bacteria in ways that support microbiome diversity. The psyllium husk in this recipe contributes additional prebiotic soluble fiber, providing fuel for butyrate-producing gut bacteria associated with colon health and reduced inflammation.
Lower in additives than commercial gluten free bread
Most commercially produced gluten free bread contains a long list of stabilizers, emulsifiers, and preservatives necessary to create shelf-stable bread with acceptable texture. This homemade recipe contains none of these — the texture comes from the natural interplay of psyllium husk gel, fermentation activity, and the flour blend, not from food technology. For people managing multiple sensitivities or those who prefer to know exactly what is in their food, this is a significant practical advantage.
Variations and add-ins
Once you have mastered the base recipe, the following variations offer a range of flavor profiles, textures, and dietary adaptations — all built on the same fundamental process.
Seeded sourdough loaf
Seeds add texture, visual appeal, and significant nutritional value to an already impressive loaf. Fold 60g of mixed seeds — any combination of sunflower, pumpkin, sesame, flax, hemp, and poppy seeds — into the dough during the mixing phase, just after the psyllium gel has been incorporated. Top the shaped loaf with additional sesame or poppy seeds before refrigerating; they will adhere to the slightly sticky dough surface and create a beautiful, bakery-worthy crust.
Flaxseeds are particularly valuable in the seed mix because their mucilage content adds additional binding strength to the dough, improving sliceability. If you include more than 20g of flaxseeds, reduce the psyllium husk by 1–2g to compensate.
Rosemary and olive focaccia
The same base dough makes an outstanding gluten free focaccia with minimal adaptation. After the bulk ferment is complete, instead of shaping into a loaf, scrape the dough into a generously oiled 9×13 inch baking pan. Press it into the pan with wet hands, working it to the edges. Cover with oiled plastic wrap and refrigerate overnight as normal.
The next day, remove from the fridge and allow to rest at room temperature for 30 minutes. Dimple the surface generously with wet fingertips, pushing deep enough to leave visible indentations. Drizzle generously with good extra-virgin olive oil, press in fresh rosemary sprigs and a few whole garlic cloves (skin on), and scatter flaky sea salt over the top. Bake at 425°F (220°C) for 25–30 minutes until deeply golden and pulling away from the edges of the pan. No Dutch oven needed.
Herb and garlic loaf
Add 3 tablespoons of finely chopped fresh herbs — rosemary, thyme, and sage work particularly well — along with 3 cloves of finely minced garlic to the dough during the mixing phase. The garlic will mellow significantly during the long cold ferment and baking, adding depth without sharpness. This variation pairs exceptionally well with soup and makes outstanding toast.
Olive and sundried tomato loaf
Fold in 80g of pitted, roughly chopped Kalamata olives and 40g of sundried tomatoes (oil-packed, drained and chopped) after the psyllium gel has been incorporated. Reduce the salt by 1–2g to account for the salt in the olives. This Mediterranean variation produces a loaf with a striking appearance and complex, savory flavor.
High-protein loaf
Replace 30g of the white rice flour with 30g of buckwheat flour and add 2 tablespoons of hemp seeds to the dough. Buckwheat is a pseudocereal — botanically unrelated to wheat — that contributes earthy, slightly nutty flavor and a meaningful boost in protein, lysine, and magnesium content. Hemp seeds add additional protein and omega-3 fatty acids. The resulting loaf is slightly darker in color and more complex in flavor than the base recipe.
Cinnamon raisin sourdough
For a naturally sweet variation, fold in 80g of plump raisins (soaked in warm water for 15 minutes, then drained) and 1.5 teaspoons of ground cinnamon during the mixing phase. Reduce the apple cider vinegar to 5g — the raisins provide natural sugars that accelerate fermentation slightly. This loaf makes exceptional toast with almond butter and is naturally sweetened without any added sugar.
Vegan and dairy-free
This recipe is already vegan and dairy-free as written — no eggs, no dairy, no honey. If you are making the yogurt-based variations sometimes found in other gluten free sourdough recipes, substitute coconut yogurt or a thick oat-based yogurt at a 1:1 ratio.
How to store and freeze gluten free sourdough bread
Room temperature storage
Gluten free sourdough bread stales noticeably faster than wheat bread — this is an inherent property of rice-flour based breads and has to do with the rate of starch retrogradation in the absence of gluten. At room temperature, store the fully cooled loaf in an airtight container, a bread bag, or tightly wrapped in beeswax wrap. It will remain at its best for up to 2 days.
After 2 days, the crust will have softened considerably and the crumb will begin to firm up. Revive it by placing slices in a toaster or under the broiler, or place the whole loaf (if not yet sliced) in a 375°F oven for 5–8 minutes. The heat reactivates the starch structure and restores much of the original texture.
Refrigerator storage
Refrigeration is not recommended for gluten free sourdough. The cold temperature of a refrigerator (around 35–40°F) is actually the optimal temperature range for starch retrogradation — the process by which cooked starches crystallize and become firm, dry, and stale. Storing gluten free bread in the refrigerator accelerates staling significantly faster than leaving it at room temperature. If you need to keep the bread fresh beyond 2 days, freezing is a far better option.
Freezer storage — the best option
Freezing is the optimal solution for extending the life of homemade gluten free sourdough. Allow the loaf to cool completely — at least 4 hours from the oven, ideally overnight — before slicing. Slice the entire loaf into individual serving slices, separate each slice with a small square of parchment paper, and layer them into a freezer-safe zip-lock bag, pressing out as much air as possible before sealing.
Frozen slices keep their quality for up to 3 months. Toast directly from frozen — do not thaw first. The high heat of the toaster rehydrates the slice and restores the crumb texture to something very close to freshly baked. For thicker slices or if you prefer a less toasted result, microwave the frozen slice for 20–30 seconds before toasting.
Frequently asked questions about gluten free sourdough bread
Can I make gluten free sourdough bread without psyllium husk?
Psyllium husk is strongly recommended and produces far superior results to any alternative. That said, if you genuinely cannot source it, the most practical substitutes are xanthan gum (use 2 teaspoons in place of 15g psyllium husk — the resulting loaf will be denser with a less open crumb) or flax gel (1 tablespoon ground flax mixed with 3 tablespoons water, rested 5 minutes, repeated to make the equivalent quantity — expect a slightly nutty flavor and a denser, more crumbly texture). Chia gel works similarly to flax gel. No substitute will exactly replicate the elastic, cohesive properties of properly hydrated psyllium husk powder.
How long does the whole process take?
The total elapsed time from mixing to first slice is approximately 24–36 hours, but the actual hands-on work amounts to roughly 30 minutes spread across two days. Day one: 30 minutes of active mixing and shaping, followed by 4–6 hours of hands-off bulk fermentation. Night one: place in the fridge and go to sleep. Day two: 45 minutes of oven preheating (hands-off), 5 minutes of scoring and loading, 50–55 minutes of baking, and 2–4 hours of cooling. The process feels longer than it is because most of the time is passive.
Can I use a bread machine for this recipe?
Not ideally, for two reasons. First, gluten free sourdough dough is significantly sticker and more paste-like than regular bread dough, which tends to wrap around bread machine paddles, preventing the consistent mixing necessary for even psyllium gel distribution. Second, and more fundamentally, bread machines cannot replicate the long cold retard that is central to this recipe’s flavor development — the temperature cycles of a bread machine keep the dough warm throughout, resulting in a faster ferment with less acid development and a noticeably blander loaf. A stand mixer with a paddle attachment can handle the mixing phase effectively; oven baking produces the best crust by a substantial margin.
What is the best gluten free flour for sourdough bread?
A blend of flours consistently outperforms any single flour in gluten free sourdough baking. White rice flour provides the most neutral, versatile structural base. Paired with tapioca starch for chew and extensibility, potato starch for lightness and moisture, and psyllium husk for binding, it closely approximates the behavior of wheat flour in a sourdough context. Single-flour recipes — whether all rice flour, all sorghum flour, or all buckwheat — almost always produce loaves that are either too dense, too crumbly, or too strongly flavored for most people’s taste. The exception is buckwheat flour, which works well at substitution levels of up to 30% of the total flour weight for a more whole-grain, nutty character.
Is gluten free sourdough bread actually healthy?
For people with celiac disease or non-celiac gluten sensitivity, homemade gluten free sourdough is one of the healthiest bread options available — it is free from the additives and preservatives in commercial GF bread, lower in refined starches than many commercial alternatives, and benefits from the fermentation process’s positive effects on digestibility and mineral bioavailability. For people without gluten-related conditions, it offers the same fermentation benefits as wheat sourdough — improved digestibility, lower glycemic response than unfermented bread, and prebiotic fiber from the psyllium husk — while being free from many of the additives found in commercial bread of any kind.
Why does my gluten free sourdough smell sour but taste bland?
A strong sour smell with a flat flavor profile most commonly indicates that fermentation happened — the acetic acid that produces sour aroma is present — but not enough of it was converted into the lactic acid and other organic compounds that create complex flavor. The fix is almost always time: extend the cold retard from 8 hours to 14–16 hours on the next bake. Also verify that the apple cider vinegar was included — it reinforces and amplifies the fermentation flavors already present. If the problem persists, the starter may be producing more acetic acid than lactic acid (a ratio that produces strong smell but flat flavor), which can be corrected by feeding more frequently with a higher hydration ratio.
Can I bake this recipe without a Dutch oven?
Yes, though the crust and oven spring will be noticeably less impressive. The Dutch oven’s most important function is trapping the steam released by the loaf during the first 20 minutes of baking, keeping the crust extensible long enough for maximum oven spring. You can approximate this with a standard oven and a pan of boiling water on the lowest rack — place the pan of water in the oven when you load the bread, and remove both the bread and the water pan after 20 minutes for the crust-browning phase. Alternatively, cover the loaf pan loosely with an oven-safe metal bowl or a large piece of foil for the first 20 minutes, then uncover for the remainder. Neither approach perfectly replicates a Dutch oven’s enclosed steam environment, but both produce reasonable results.
My starter is ready but I’m not ready to bake — what do I do?
Simply feed your starter as normal and place it in the refrigerator. A refrigerated starter can be maintained almost indefinitely on once-weekly feedings. When you are ready to bake, remove it from the fridge 12–24 hours before you intend to mix the dough, feed it once at room temperature, and allow it to reach peak activity before using. After an extended period of refrigeration, you may need to give the starter two or three room-temperature feeds over 24–48 hours to bring it back to full activity before baking.
The Best Gluten Free Sourdough Bread
Course: News12
servings30
minutes50
minutes300
kcalIngredients
- Dry Ingredients
1 and 1/4 cups white rice flour
2/3 cup tapioca starch
1/3 cup potato starch
1 tbsp psyllium husk powder (not whole husks)
1.5 tsp fine sea salt- Wet Ingredients
150g active gluten free sourdough starter (at peak — bubbly and domed)
280g filtered or non-chlorinated water, room temperature
10g apple cider vinegar
15g olive oil (optional but recommended)
Directions
- Make psyllium gel: whisk 15g psyllium powder into 100g of the measured water. Set aside minimum 15 minutes until fully gelled.
- In a large bowl, whisk together rice flour, tapioca starch, potato starch, and salt until evenly combined.
- In a separate jug, stir together the starter, remaining 3/4 cup of water, apple cider vinegar, and oil until starter is fully dispersed. Pour wet ingredients into dry. Stir briefly. Add psyllium gel. Mix vigorously for 2–3 minutes until smooth and thick.
- Pour wet ingredients into dry. Stir briefly. Add psyllium gel. Mix vigorously for 2–3 minutes until smooth and thick.
- Cover and bulk ferment at room temperature (75–80°F) for 4–6 hours until slightly puffed with surface bubbles.
- With wet hands, scoop dough into a well-oiled 9×5 inch loaf pan. Smooth the top. Cover with oiled plastic wrap.
- Cold retard: refrigerate the shaped loaf for 12–16 hours.
- Preheat oven to 450°F with Dutch oven inside for 45 minutes.
- Score cold loaf with one confident slash at 30 degrees. Lower into hot Dutch oven. Bake covered for 20 minutes. Remove lid. Bake uncovered 30–35 minutes until deeply golden (internal temp 208–210°F).
- Cool on wire rack minimum 2 hours (preferably 3–4 hours) before slicing.
Notes
- Nutrition (per slice, approx.): Calories: 165 | Carbs: 32g | Protein: 2g | Fat: 3g | Fiber: 3g | Sodium: 180mg
RECIPE DETAILS
| Prep Time | Inactive Time | Bake Time | Total Time | Yield |
|---|---|---|---|---|
| 30 min | 12–16 hrs | 50–55 min | ~17–18 hours | 1 loaf (12 slices) |
Final thoughts
Gluten free sourdough bread is one of the most rewarding bakes in the gluten free kitchen — perhaps in any kitchen. It demands more patience than a quick bread and more precision than most yeast recipes. But the result — a loaf with a deep, crackling crust; an open, chewy crumb; and the genuine, complex tang of real sourdough fermentation — is worth every hour of the wait and every gram measured on the scale.
The process becomes intuitive surprisingly quickly. After two or three bakes, reading your starter’s activity, shaping a sticky dough with wet hands, and judging the bulk ferment by sight and smell rather than by the clock becomes second nature. The loaves get better as your starter matures — a starter you have been feeding for six months will produce noticeably more flavorful bread than a freshly established one, and a mature starter is one of the most useful things in any dedicated baker’s kitchen.
Start your starter this week. Bake your first loaf next weekend. Make notes on what worked and what you would do differently. Bake again. Gluten free sourdough is a skill, and skills improve with practice. By your fifth loaf, you will be baking bread that rivals anything available commercially — and you will know exactly what is in every slice.
 (1)")


I love the name of your web-site! I have a personal and family hx of IBD and going GF was a game changer for me. (Convinced that I have celiac; carrier of the gene.) Your web-site is thorough and well written. I have played around with various recipes and find your web-site to be one of the most helpful ones.
thank you!
Thanks Kris! Hop on our newsletter if you aren’t already on it… we have a lot of good stuff there too!
And if you are interested – we just launched this: https://crohns-and-colitis-dietitians.thrivecart.com/ibd-collective/